
Drip Tape Selection
To select the right Drip Tape for your farm you need to decide on an emitter flow rate, an emitter spacing, a wall thickness and a tape diameter. There are several options for each of these parameters resulting in a huge number of combinations to choose from that can be bewildering to the first time tape user. In the table below we summarize all of these parameters in one place, and the main drivers that should influence your selection.
A few words about drip tape application rate
When selecting your drip tape flow rate, you should ultimately be concerned with the application rate, in inches-per-hour, of your system. The application rate of your system is determined by your emitter flow rate, emitter spacing and average spacing between your drip tape laterals. If you know your application rate, and you know the Evapotranspiration Rate of your crop (inches of water consumed by your crop each day), you know how long you need to run your system to meet your crop's needs. Specifically,

In this equation, AR is application rate in inches per hour, Emitter Flow Rate is in GPH per hour and Emitter Spacing and Lateral Spacing are both in inches. Lateral Spacing is the average spacing between laterals if you don't have uniformly spaced laterals. For example, if you have 3 laterals per bed and your beds are on 9-foot centers, then your Lateral Spacing is 36".
As an example, if you are using a .25 GPH emitter, a 12" emitter spacing and a 48" spacing between laterals, your application rate from the equation above is 0.1 in/hour. If you are irrigating mature corn in a warm environment with an evaportranspiration rate of .3 in/day, you need to run your system 3 hours per day (or 6 hours every other day) to meet your crop's water needs.
A few words about filtration for Drip Tape
All drip and micro irrigation devices require filtration to avoid emitter clogging. This is especially true with drip tape which has exceptionally low emitter flow rates. If you are using well or municipal water that is relatively clean and only contains inorganic contaminates such as sand or well casing, a Plastic Screen Filter (small systems) or Metal Screen Filter (large systems) can be the right choice. If you are using surface water that contains organic contaminants such as algae or bacteria, or if you are delivering fertilizers through your system (especially organic fertilizers), you should use a Sand Media Filter. Even when using a sand media filter it can be a good idea to use a smaller screen filter downstream as a backup.
DRIP TAPE SELECTION CRITERIA
|
Parameter |
Typical Values |
Effect on Performance |
Notes |
Drip Tape Diameter |
|
|
|
Drip Tape Wall Thickness |
|
|
|
|
Drip Emitter Spacing
|
|
|
|
Drip Emitter Flow Rate |
|
|
|
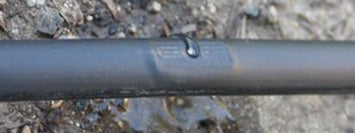
Irritec P1 Drip Tape
Grow Irrigation proudly carries the Irritec P1 line of drip tape products. Irritec P1 is a high quality drip tape based on an injection molded emitter which provides accurate and consistent flow rates with high resistance to clogging. The tape body is extruded from an HDPE resin which offers high tensile strength for easy installation as well as high toughness for resistance to pests and mechanical field damage. The Irritec P1 line carried by Grow Irrigation offers multiple options for each parameter summarized in the above table.